Your guided tour of TradeXecutor
A walkthrough of every tab, button, and control in the dashboard — so you know exactly where to find things and how to put them to work. Plan on about 10 minutes.
What is TradeXecutor?
The 30-second version before we dive into the UI.
TradeXecutor is the bridge between your TradingView alerts and your Tradovate accounts. Your charts send webhook alerts to us, we match them to a strategy you configured, and your broker executes — with advanced order types like ATM and OCO brackets, fanned out across multiple accounts simultaneously.
The flow in one sentence
- TradingView alert → TradeXecutor webhook → matched on strategy name → routed to your Tradovate account(s) → order placed.
The Dashboard, at a glance
One page. Always-visible status and controls up top, tabs below.
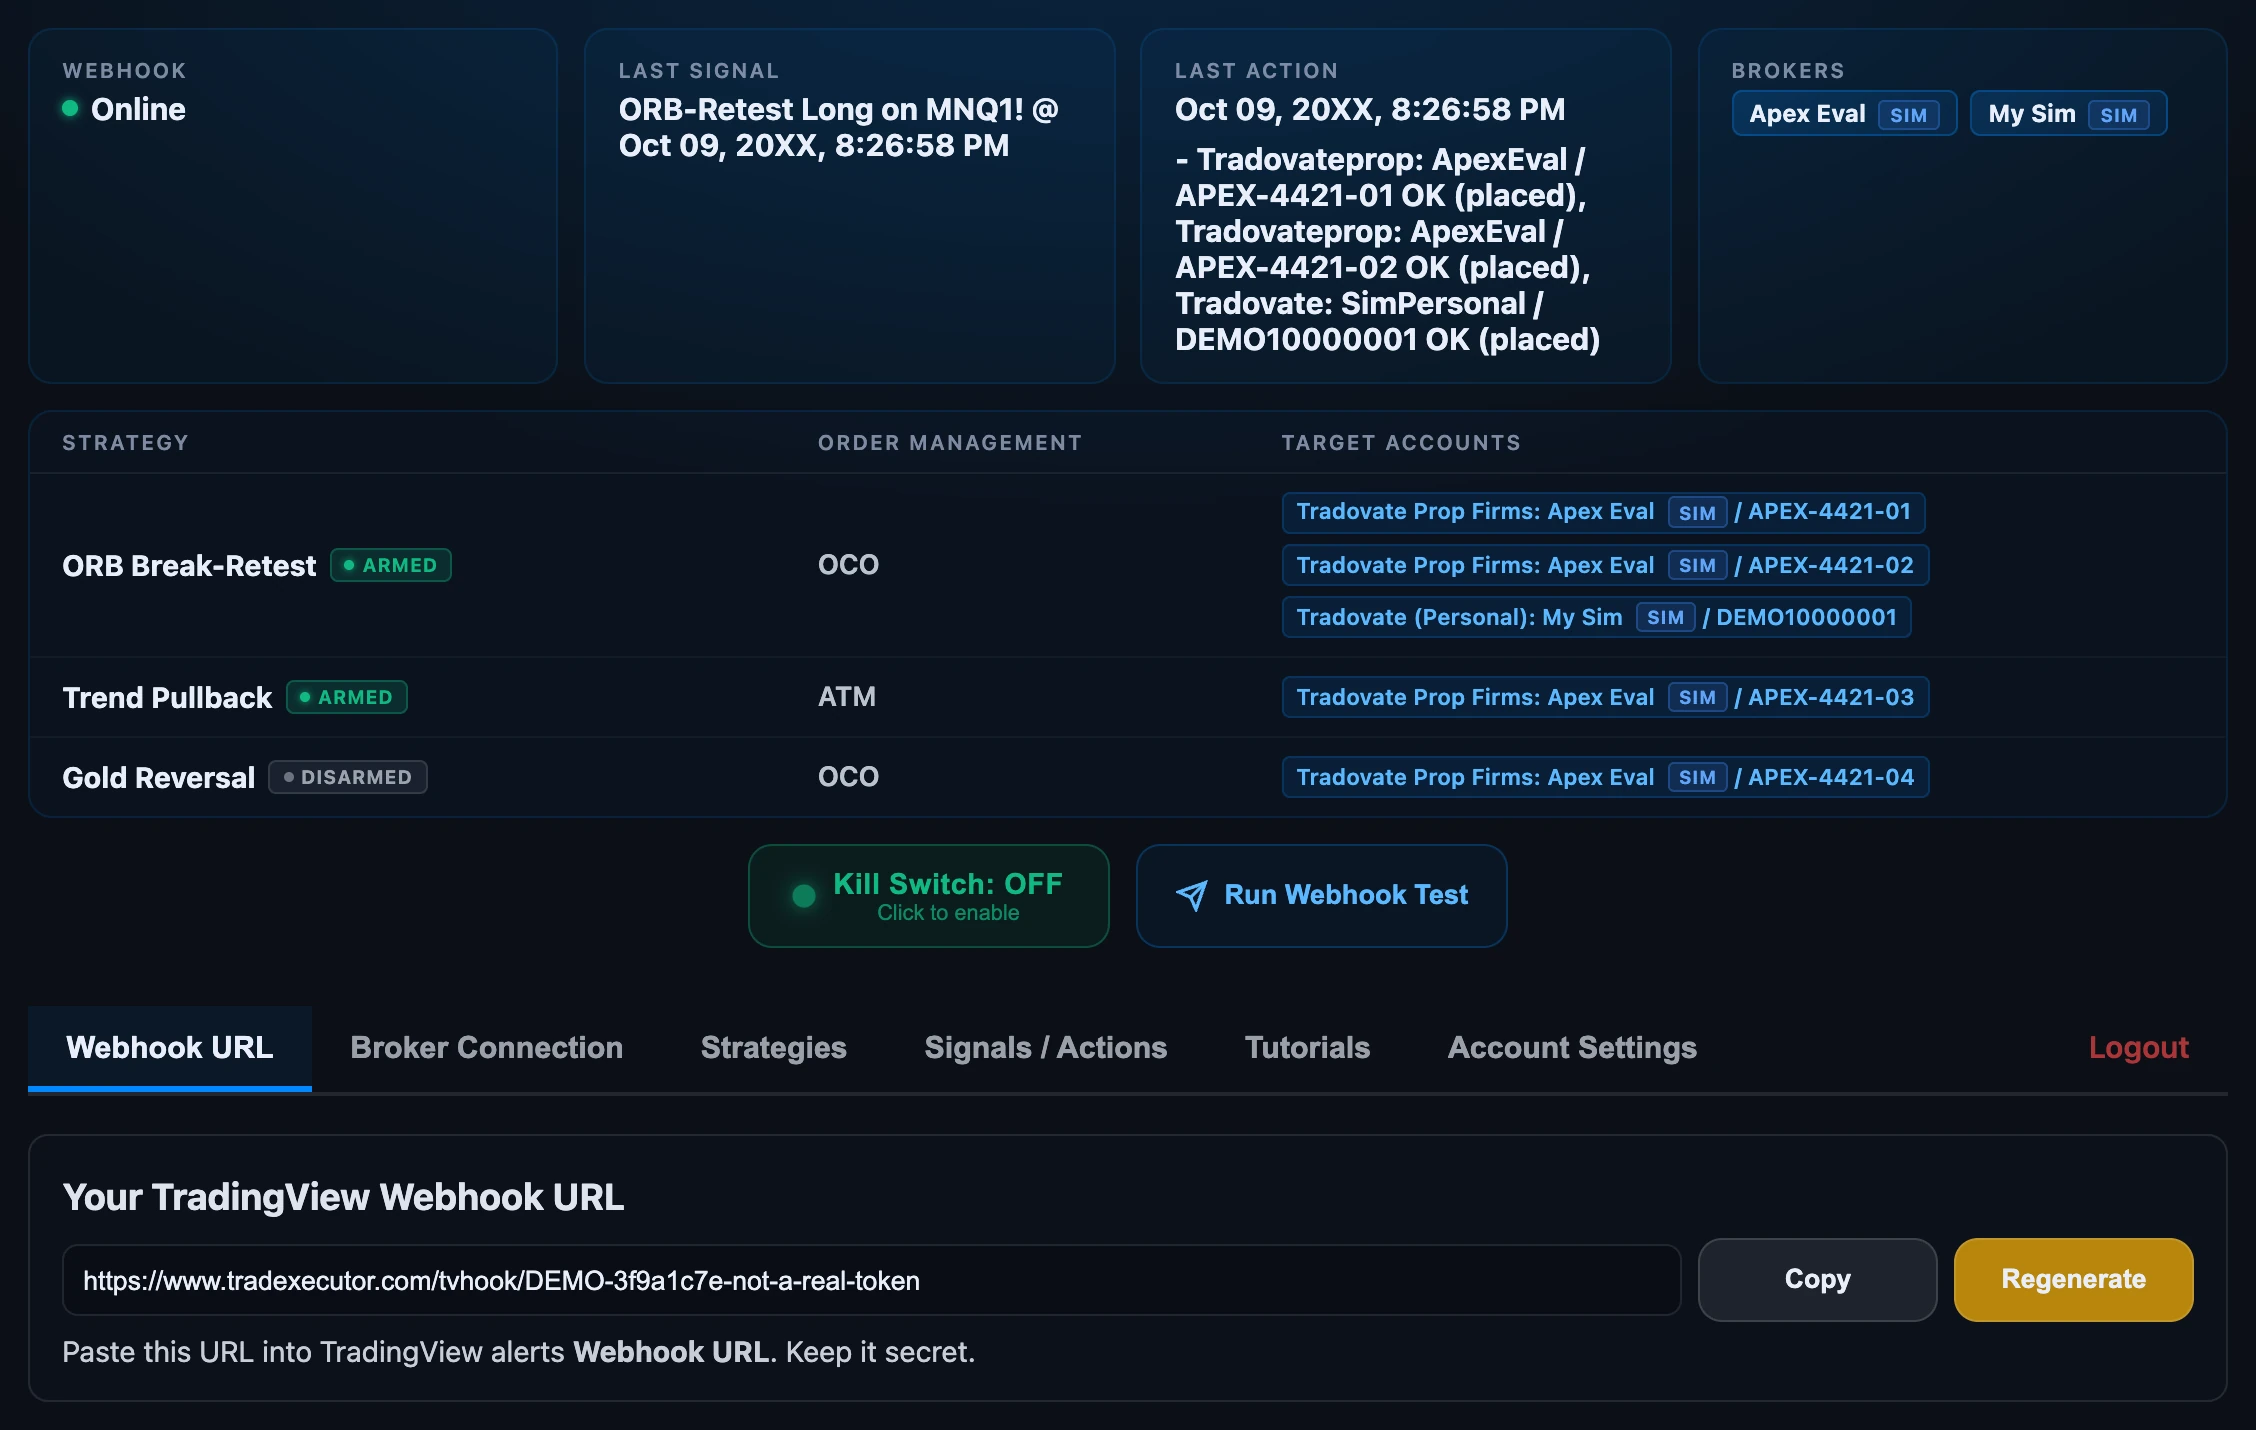
After you sign in, the Dashboard is the only screen you need. From top to bottom, it has three zones that never move and a tab bar that swaps the content below it.
The three persistent zones (always visible, every tab)
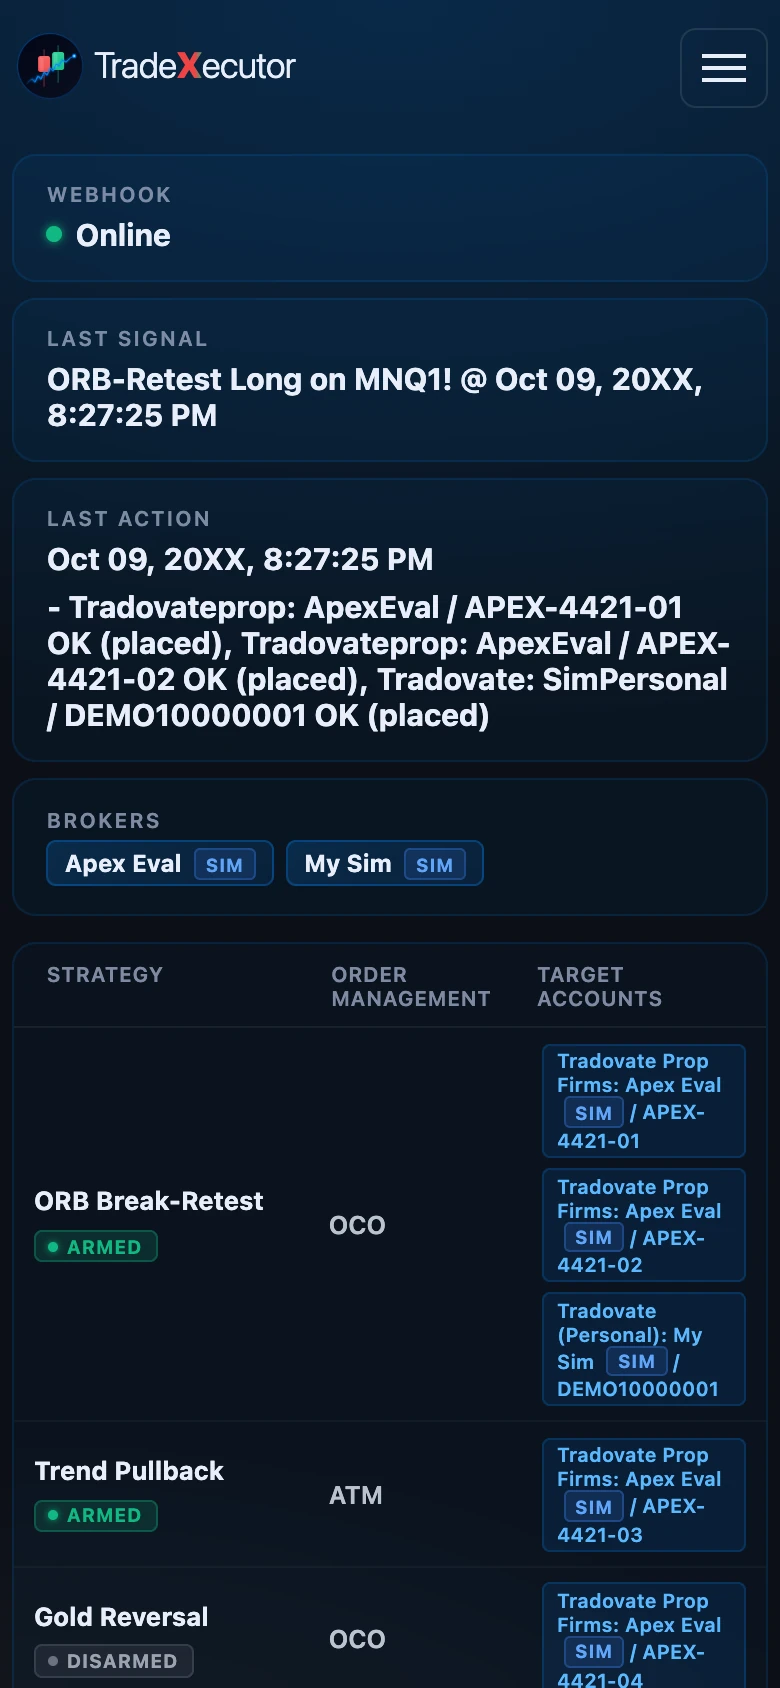
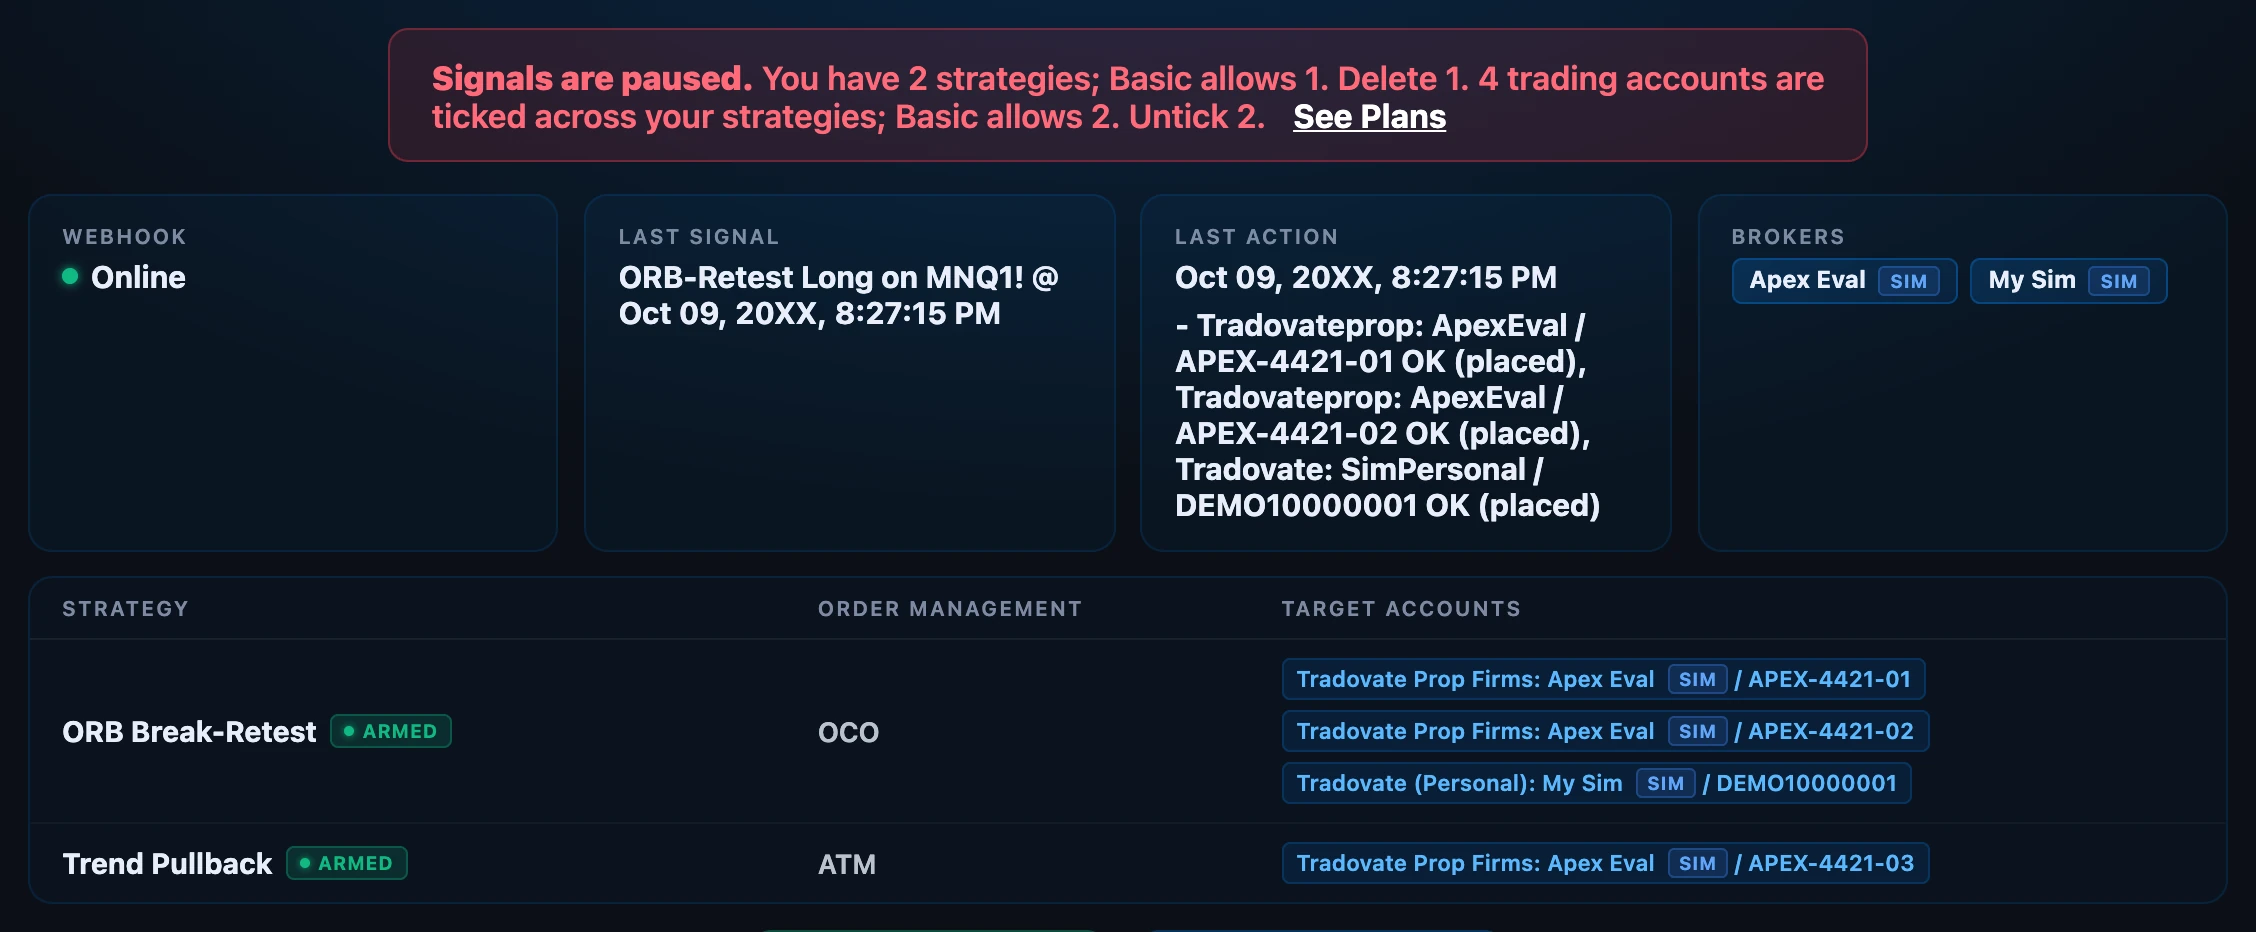
- Status cards (top) — four cards showing: Webhook health, Last Signal received, Last Action taken, and your connected Brokers.
- Strategy overview panel (visible once you have strategies) — a read-only summary row per strategy showing name, ARMED/DISARMED status, order management mode, and target accounts. This is display only; to change armed state go to the Strategies tab.
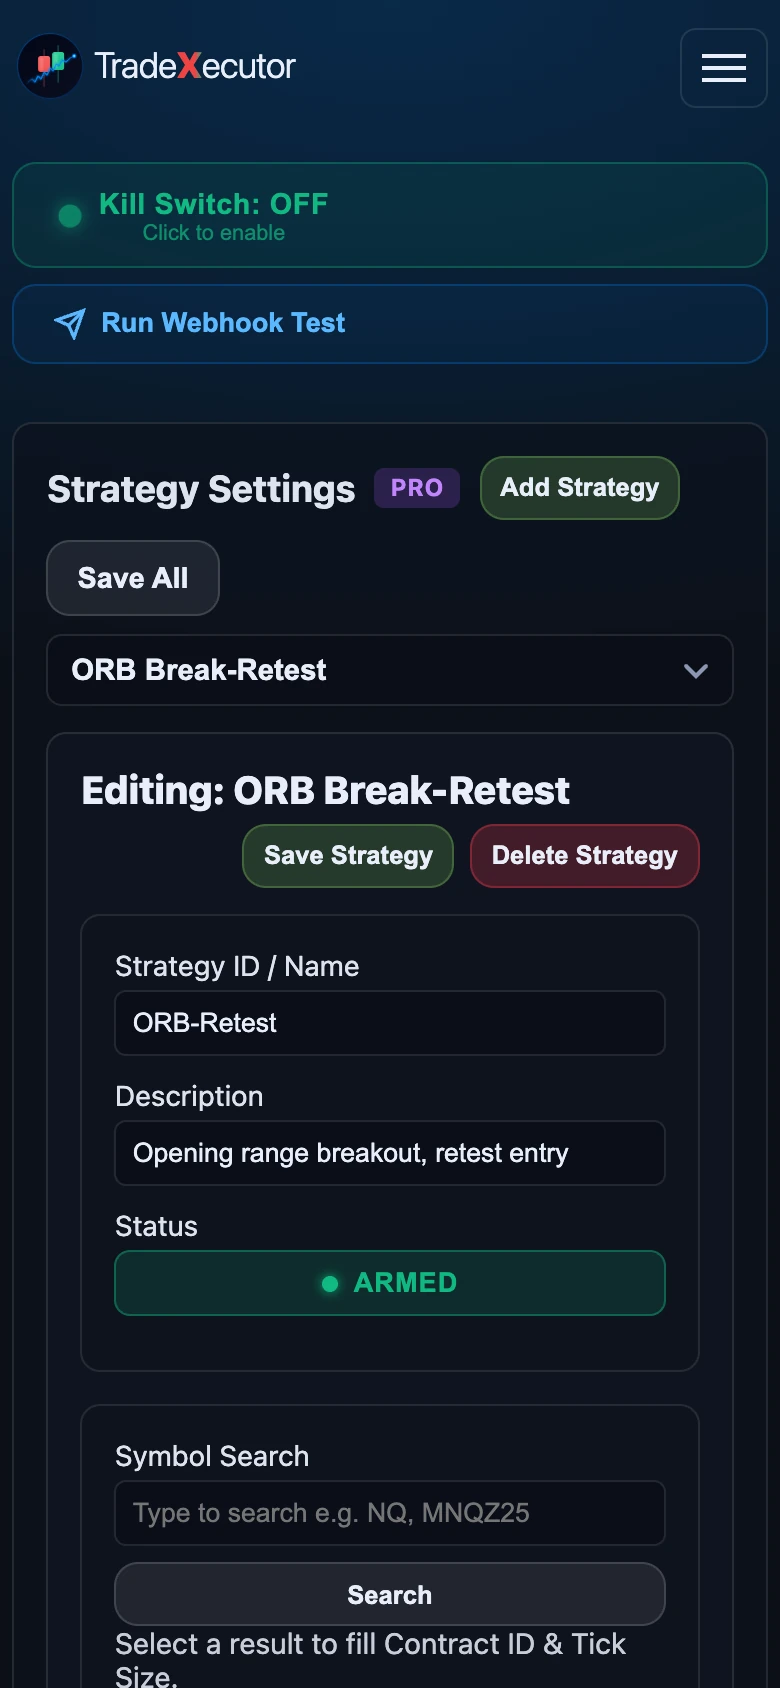
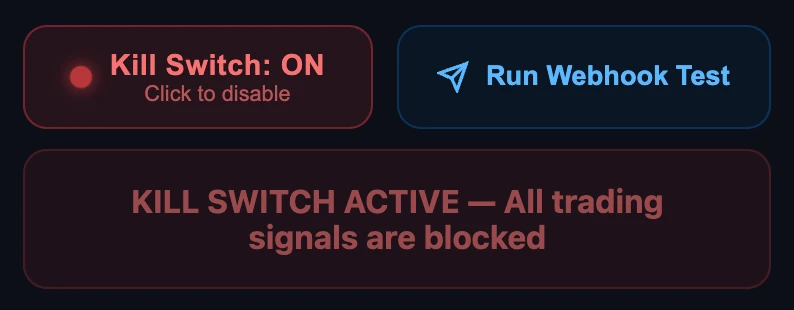
- Action bar — the Kill Switch on the left and Run Webhook Test on the right. Persistent on every tab, desktop and mobile.
The tab bar (below the persistent zones)
- Webhook URL — copy your unique TradingView webhook URL.
- Broker Connection — connect Tradovate accounts (personal, prop firm, live, sim).
- Strategies — create the routing rules that turn signals into orders.
- Signals / Actions — the live audit log of what came in and what happened.
- Tutorials — videos and written guides (this page).
- Account Settings — subscription, profile, announcements.
If you ever see a red Signals are paused bar above the status cards, your setup is over a plan limit. It tells you exactly what to fix, and signals resume as soon as you do (see Account Settings).
On your phone
The dashboard adapts to small screens: the same cards, Kill Switch and tabs, stacked in one column.
The Status Strip
Four cards at the top that tell you everything is (or isn’t) working.
The strip at the very top of the dashboard is an at-a-glance health check. Four cards, left to right: Webhook, Last Signal, Last Action, Brokers. You don’t need to open any tab to read it — that’s the whole point.

What each card means
- Webhook — green = we’re accepting alerts; red = something’s wrong on our end; yellow = unknown / not seen a signal yet.
- Last Signal — most recent alert received, with strategy name + direction + symbol + time. Shortcut: matches the top row of the Signals log.
- Last Action — what we actually did with the most recent signal (Order Placed on each account, Blocked by Kill Switch, Disarmed, REJECTED for a setup that is over your plan, etc.).
- Brokers — chips for each connected broker. The small SIM or LIVE tag tells you the environment you’re trading in.
The Kill Switch
One button to halt all trading. Always one click away.
The Kill Switch sits in the action bar directly below the status strip — so on every tab, desktop or mobile, it’s always visible without scrolling. When toggled ON, TradeXecutor continues to receive signals but blocks every outgoing order, across every strategy and every account.

Tab — Webhook URL
Your unique URL that TradingView alerts post to.
This tab gives you one URL to paste into TradingView’s Alert → Webhook URL field. The URL is unique to your account — it’s how we know an incoming signal belongs to you. There are two buttons: Copy and Regenerate.

- 1Click Copy to put the URL on your clipboard.Never share this URL — it’s effectively a key to your account.
- 2In TradingView, open your alert, tick the Webhook URL checkbox, and paste.The checkbox lives on the alert’s Notifications tab.
- 3Back on the dashboard, press Run Webhook Test to confirm wiring.You’ll see a row appear in the Signals / Actions log.
Tab — Broker Connection
Link a Tradovate login once. Every account under it appears automatically.
The Broker Connection tab shows a grid of your Connected Accounts and an + Add Connection button. Each card represents one broker login — a Tradovate personal account or a Tradovate Prop firm connection. You can have multiple cards (e.g. one Apex eval, one paper sim, one live account).
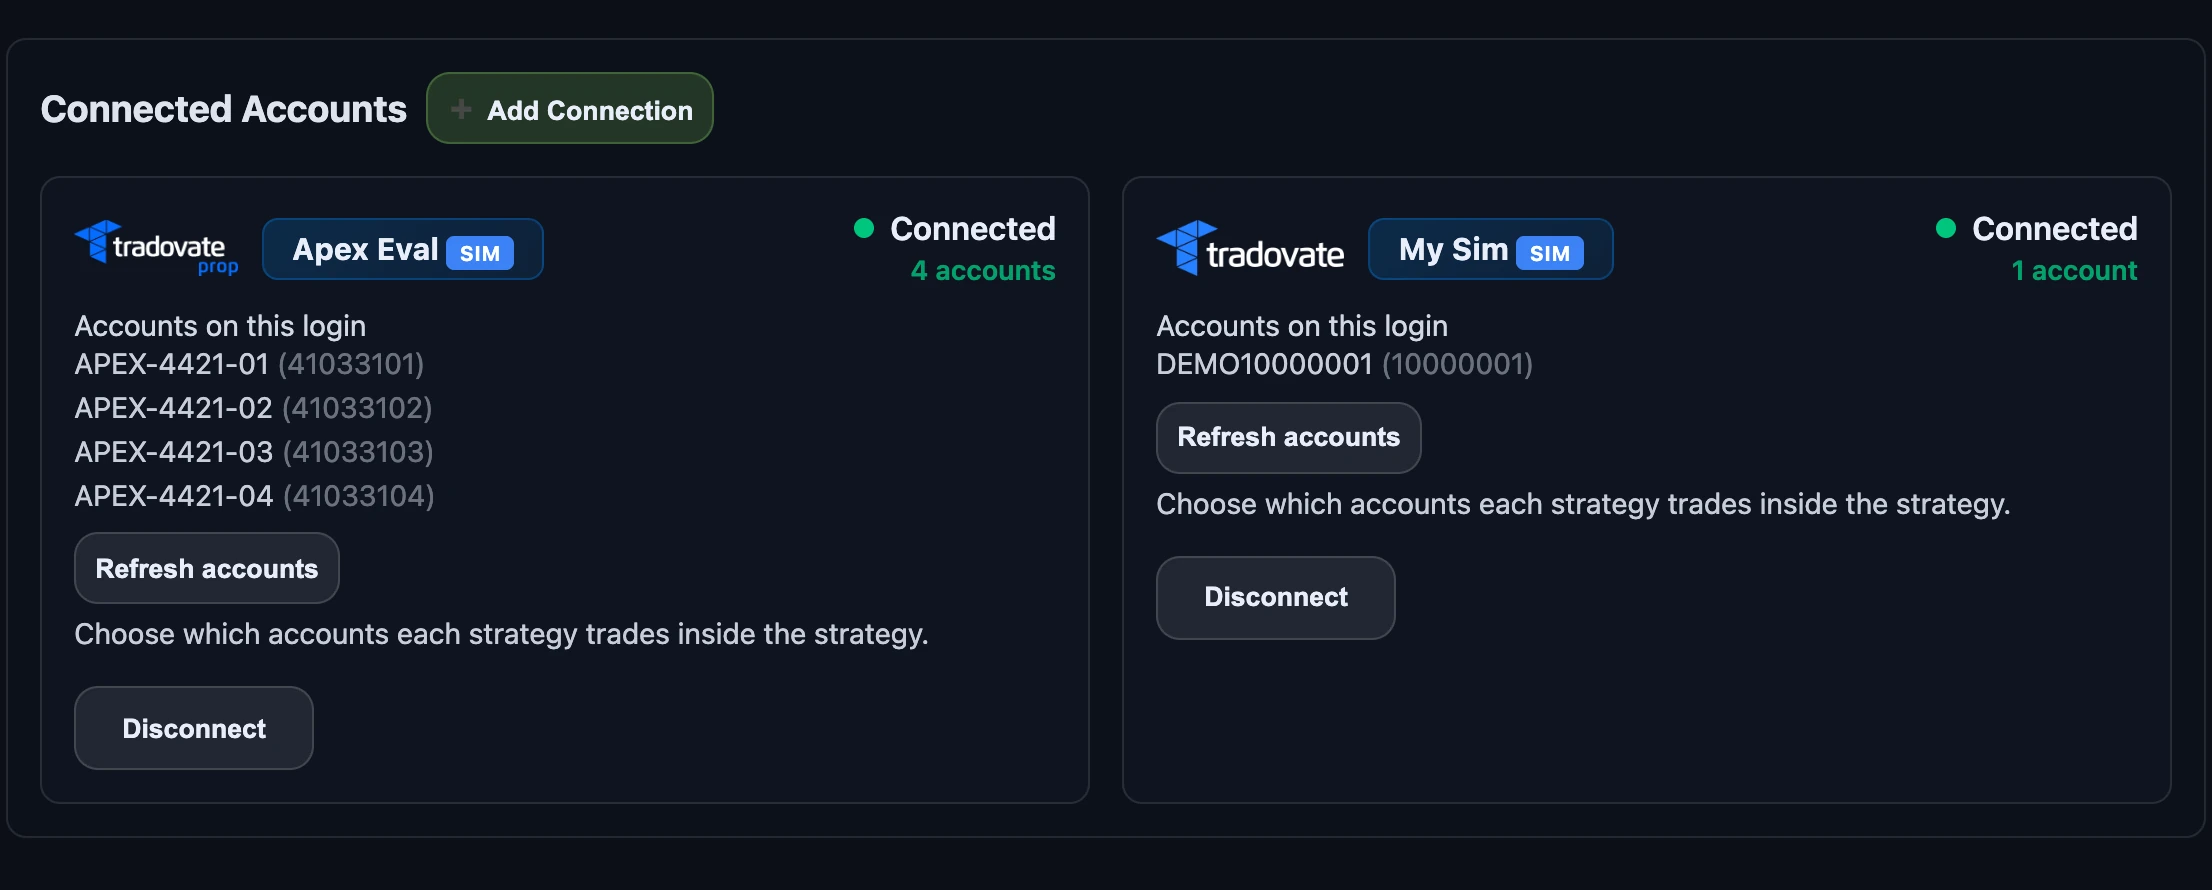
Each card is one login. Under its name you see every trading account that login owns (a prop firm login can have several). There is nothing to select here: you choose which accounts each strategy trades inside the strategy (next lesson). If an account is added or reset at your prop firm later, press Refresh accounts to reload the list.
How to add a connection
Adding a connection is a 4-step process. Here’s each step:
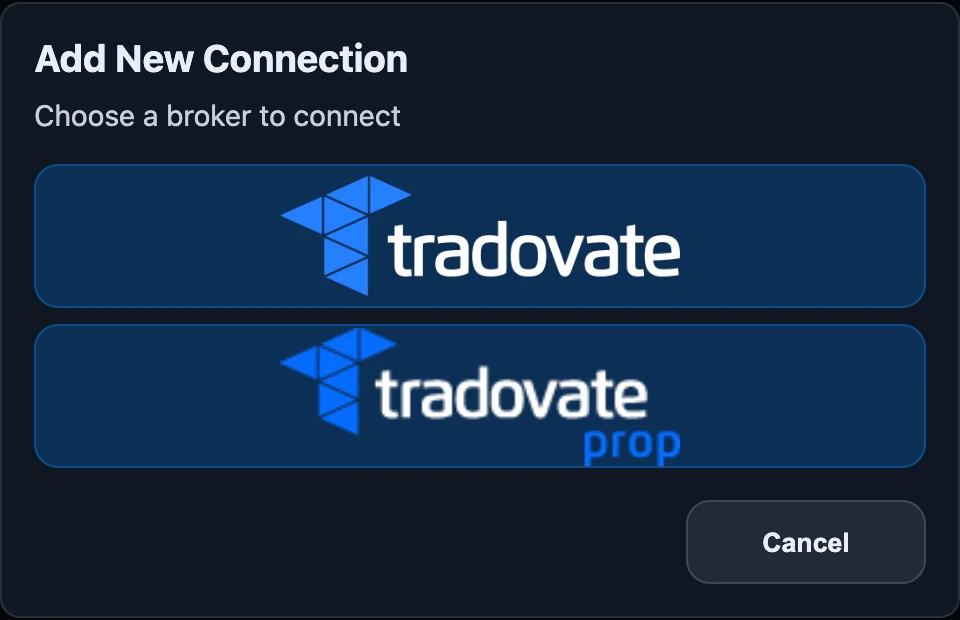
- 1Press + Add Connection. A modal appears asking you to choose a broker.
- 2Choose tradovate for personal accounts (live or paper sim), or tradovate prop for prop firm accounts (Apex, Topstep, etc.).
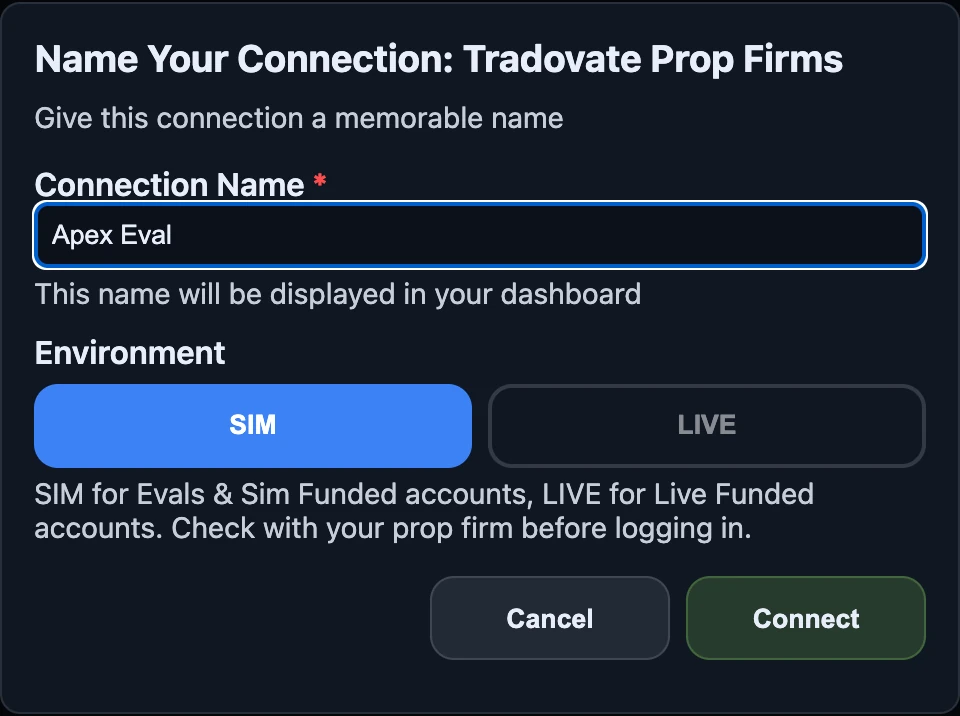
- 3Enter a Connection Name (e.g. “Apex Eval”), then choose SIM or LIVE environment. Use SIM for all evaluations and sim-funded accounts. Use LIVE only if you have been specifically issued a live-funded account. Check with your prop firm if unsure. Press Connect — you’re taken to Tradovate’s OAuth page to log in.
- 4After OAuth you return to the Broker Connection tab and see your new card with all the accounts under that login listed on it (for example
APEX-4421-01 (41033101)). You do not pick one here: you choose the accounts per strategy in the next lesson. If an account is missing, press Refresh accounts.
Tab — Strategies
Where signals are matched and turned into orders.
A Strategy is a named routing rule. Every incoming webhook is matched to a strategy by name — that match determines which order type and which accounts get the trade. You can have multiple strategies; each is independently armed or disarmed.
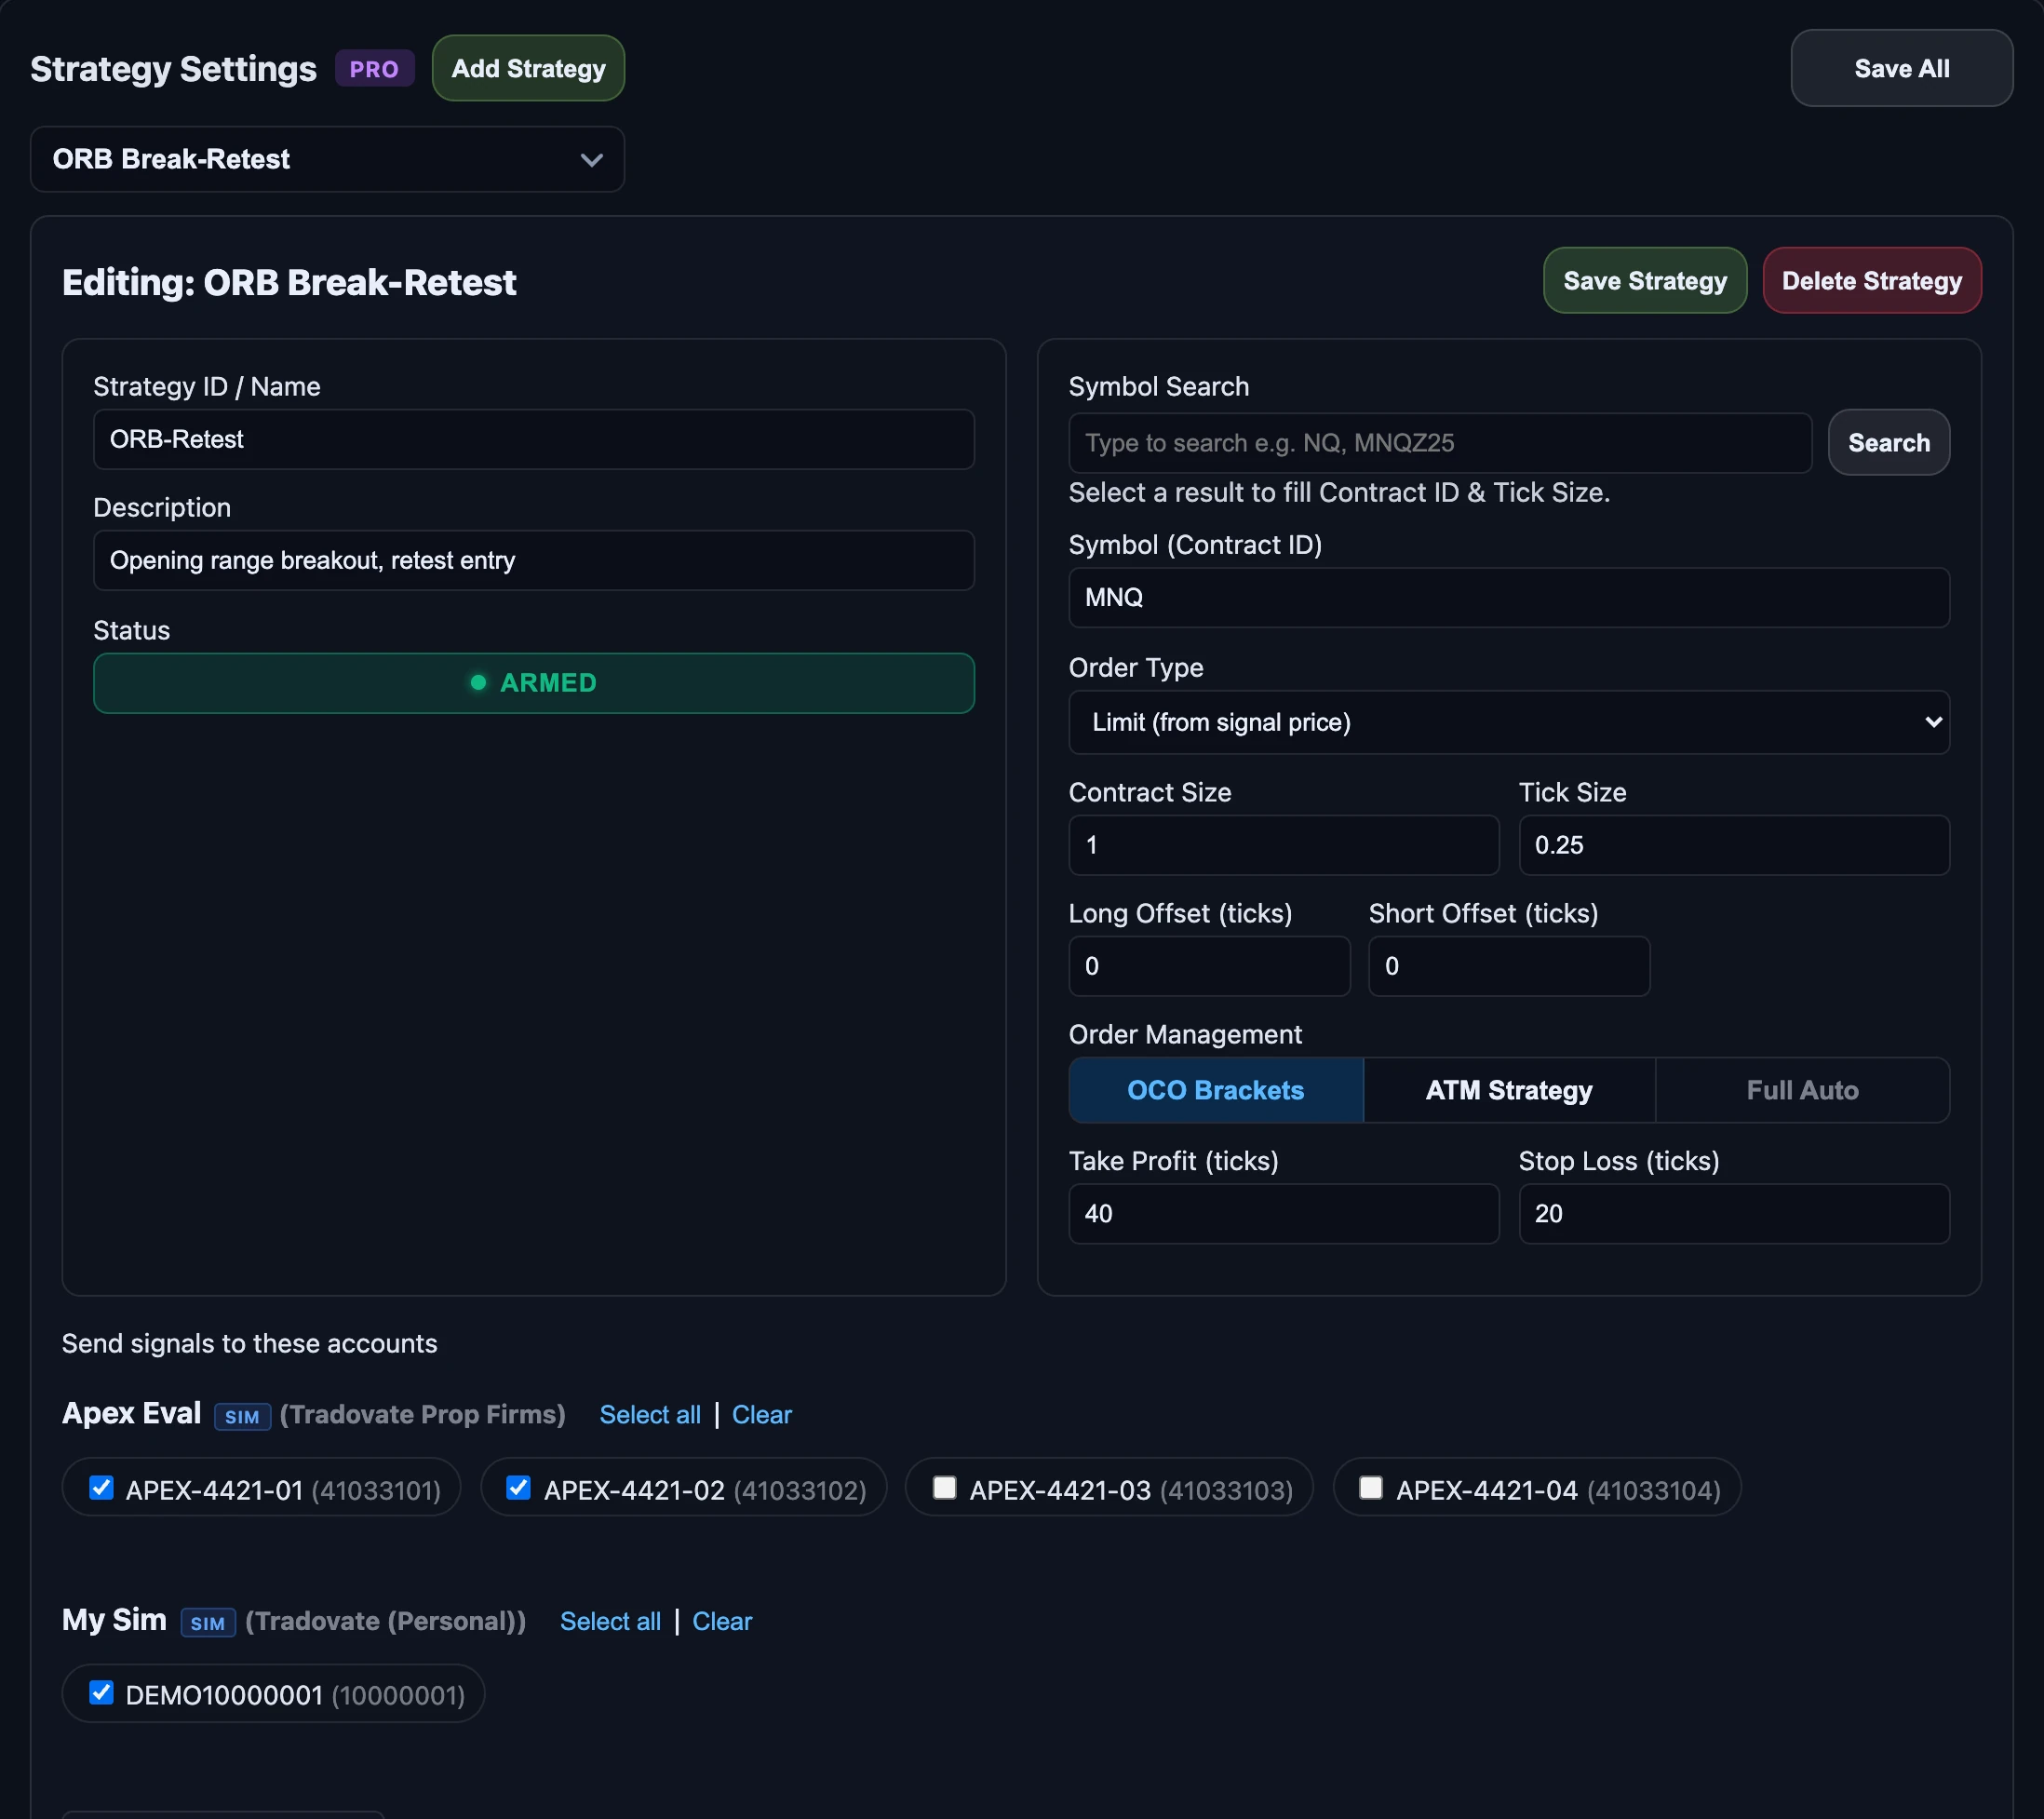
The Send signals to these accounts section lists every login you have connected, with one tick per account:
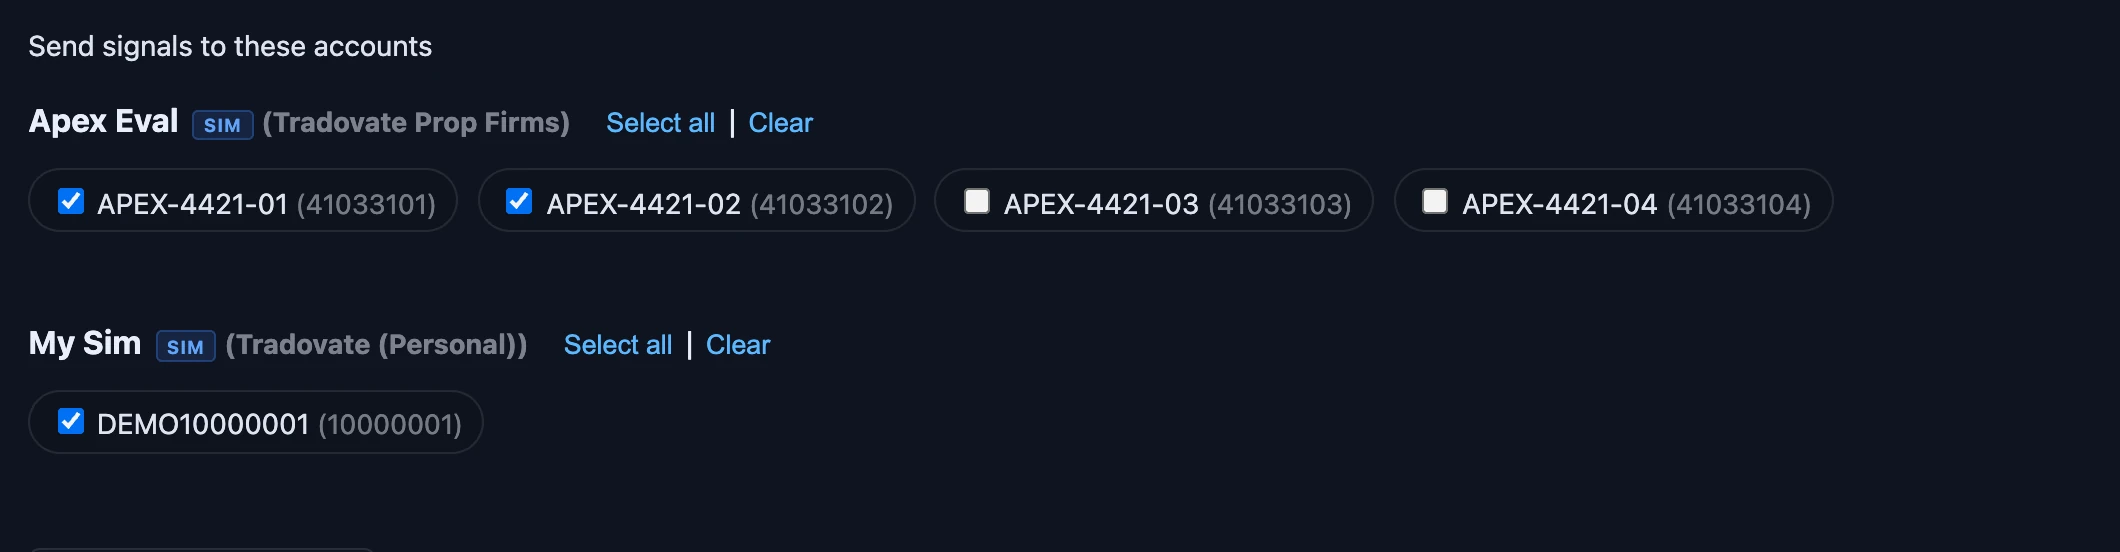
Tick the accounts this strategy should trade. Each login has a Select all and a Clear link to tick or untick all of its accounts at once (on Basic, Select all stops at your two-account limit). Each ticked account gets its own order with this strategy’s size and brackets, and one account failing never stops the others. Different strategies can tick different accounts on the same login. A strategy with no accounts ticked shows a NEEDS ACCOUNTS badge on the dashboard and stays paused until you tick at least one and save.
How to create a strategy
- 1Press Add Strategy. A new blank entry appears in the dropdown.
- 2Set the Strategy ID / Name — this must match the
"id"in your TradingView webhook JSON exactly (case-sensitive). - 3Add a Description so you can tell strategies apart at a glance.
- 4Use Symbol Search to find your contract (e.g. type MNQ or MNQZ25). Click a result to auto-fill the Contract ID and Tick Size.
- 5Set Order Type (how your entry price is determined) and Order Management mode (OCO, ATM, or Full Auto).
- 6Under Send signals to these accounts, tick each account this strategy should trade. Every account on every connected login is listed.
- 7Toggle Status to ARMED (it turns green and pulses), then press Save Strategy.
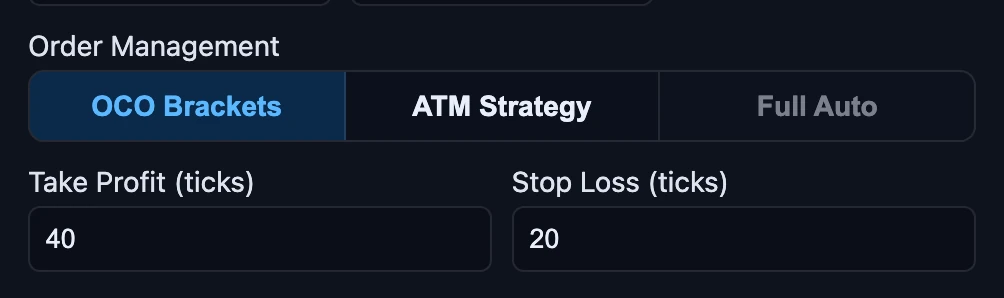
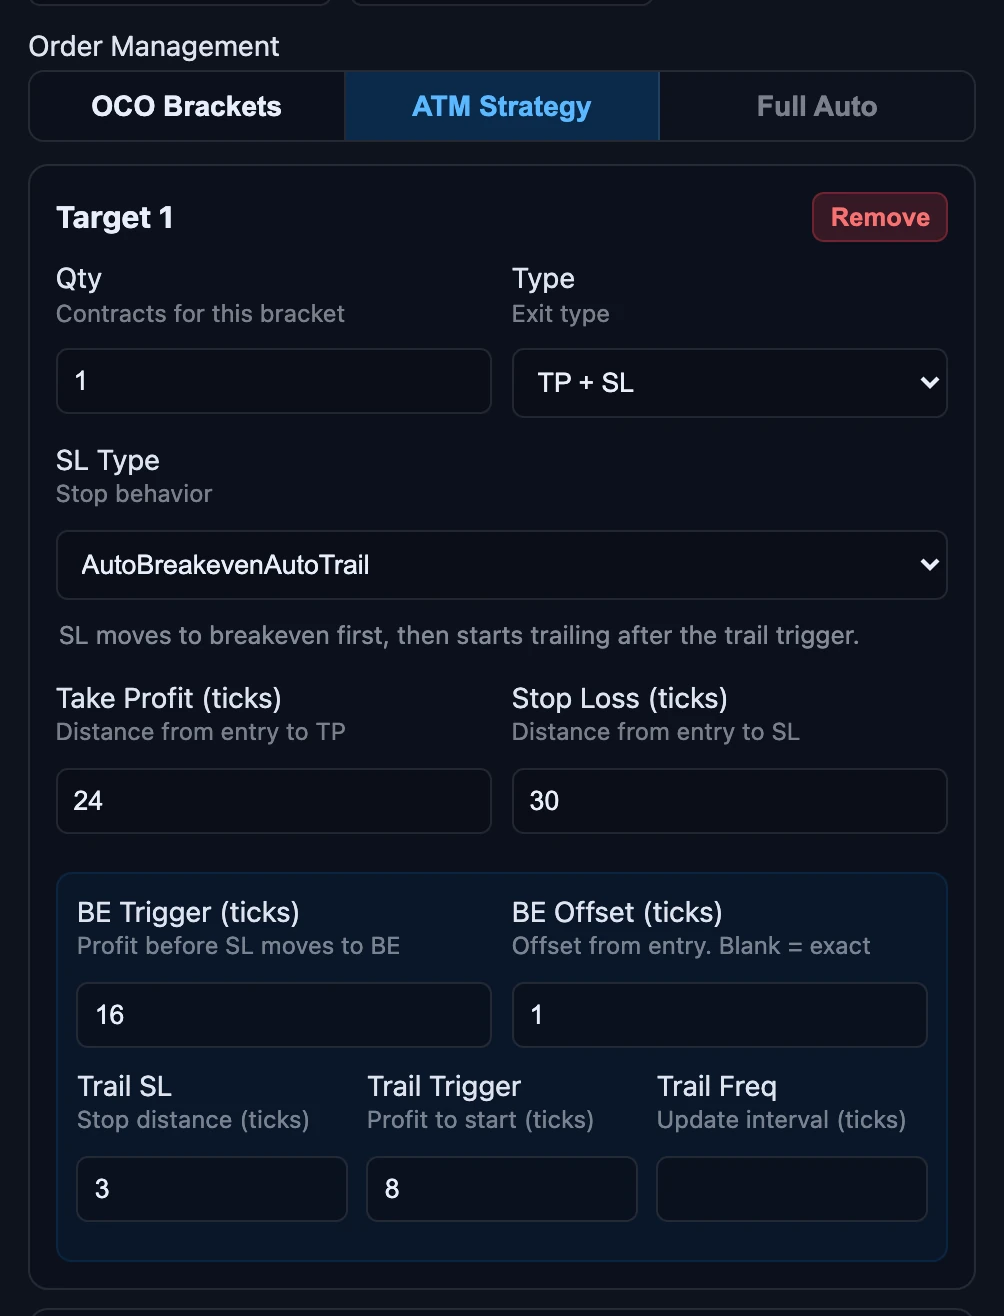
Order Management modes
- OCO Brackets — One-Cancels-Other. Set Take Profit and Stop Loss in ticks here in the editor.
- ATM Strategy — Tradovate Automated Trade Management. Multi-target brackets, breakeven triggers, trailing stops — all configured here.
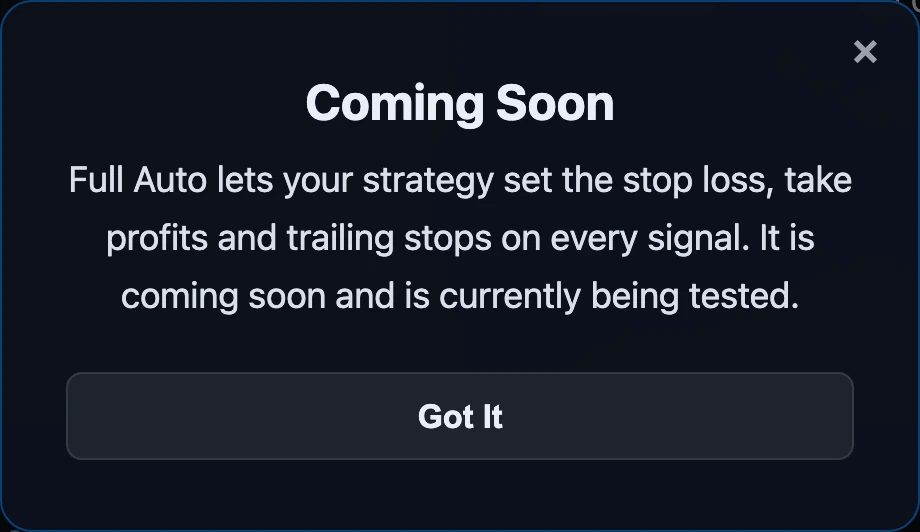
- Full AutoComing soon — your strategy sets the stop loss, take profits and trailing stops on every signal; the alert carries the full bracket. Nothing to configure here. It is being tested, so the button is locked on most plans for now.
Plan limits
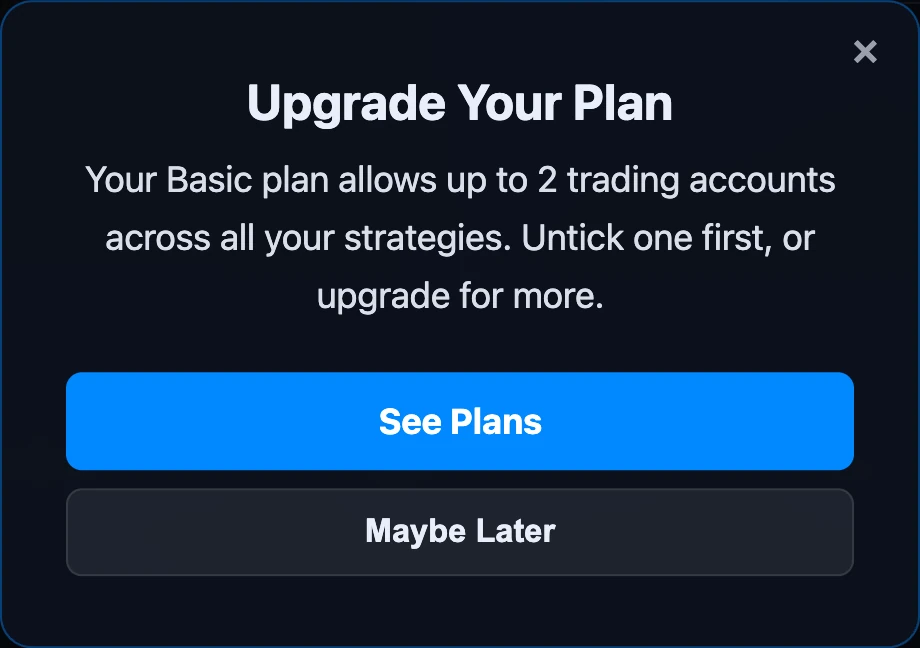
- Basic — 1 strategy and up to 2 trading accounts in total. An account used by two strategies counts once.
- Pro — unlimited strategies and trading accounts.
- Ticking an account over your limit is refused with a message, so nothing is changed behind your back:
ARMED vs DISARMED
- ARMED (green, pulsing dot) — signals matching this strategy’s name will be executed. Toggle is in the Status field inside the strategy editor.
- DISARMED (gray) — signals are logged but no orders are placed. Use this to pause a strategy without deleting it.
"id" matches perfectly.The Webhook Message (JSON)
What your TradingView alert needs to send. And where the strategy name goes.
When TradingView fires an alert, it POSTs a JSON body to your webhook URL. TradeXecutor reads that body, looks up the "id" field, and matches it against your Strategy names. If the names don’t match, the signal is logged and dropped.
Minimum JSON (OCO strategy)
If your strategy on TradeXecutor is set to OCO Brackets or ATM Strategy, your TradingView alert only needs to tell us which strategy and which direction:
{
  "id": "ORB",
  "symbol": "",
  "direction": "long",
  "price": ""
}
Field-by-field
- id — must match the Strategy ID / Name on the Strategies tab, character-for-character.
- symbol — a label only.
is TradingView’s placeholder for the chart’s current symbol. TradeXecutor ignores it and trades the Contract ID set on your Strategy, so keep that current (contracts expire every quarter). - direction —
"long"or"short"(buy or sell). - price — signal price.
resolves to the candle’s close on the alert bar.
Full JSON (Full Auto mode)Coming soon
Full Auto is coming soon and is in testing. In OCO and ATM you type the stop and targets on the strategy card and every trade uses them. In Full Auto your TradingView strategy works them out fresh for every trade and sends them in the alert. TradeXecutor passes exactly that order to your broker; it never manages or tracks the position for you.
- Create the strategy, set it to Full Auto, pick the contract with Symbol Search and tick your accounts.
- On the strategy card, press Copy brief. Your Strategy ID is already inside it.
- Paste the brief into your AI assistant and ask it to build your TradingView strategy.
- Run it on a sim account first.
The alert it sends looks like this (distances are in ticks from that order’s own entry, exactly like the ATM card):
{
  "id": "ORB",
  "symbol": "",
  "direction": "long",
  "price": "",
  "atmTargets": [
    {
      "qty": 6,
      "tpTicks": 22,
      "slTicks": 30,
      "slType": "AutoBreakevenAutoTrail",
      "bevenProfitTrigger": 20,
      "bevenOffset": 1,
      "trailStopLoss": 3,
      "trailProfitTrigger": 7
    }
  ]
}
Where to put this in TradingView
In TradingView, open your strategy alert and scroll to Message (sometimes labeled Alert Message). That’s the field that becomes the JSON body of the webhook. Paste the JSON there.
{
  "id": "ORB",   // must match Strategy name
  "symbol": "",
  "direction": "long",
  "price": ""
}
Tab — Signals / Actions
Two live tables: what came in, and what we did.
Two log panels side by side: Signals Received on the left (everything that came into your webhook) and Actions on the right (what TradeXecutor did with each one). Above the panels, a Refresh button and a red Clear button.
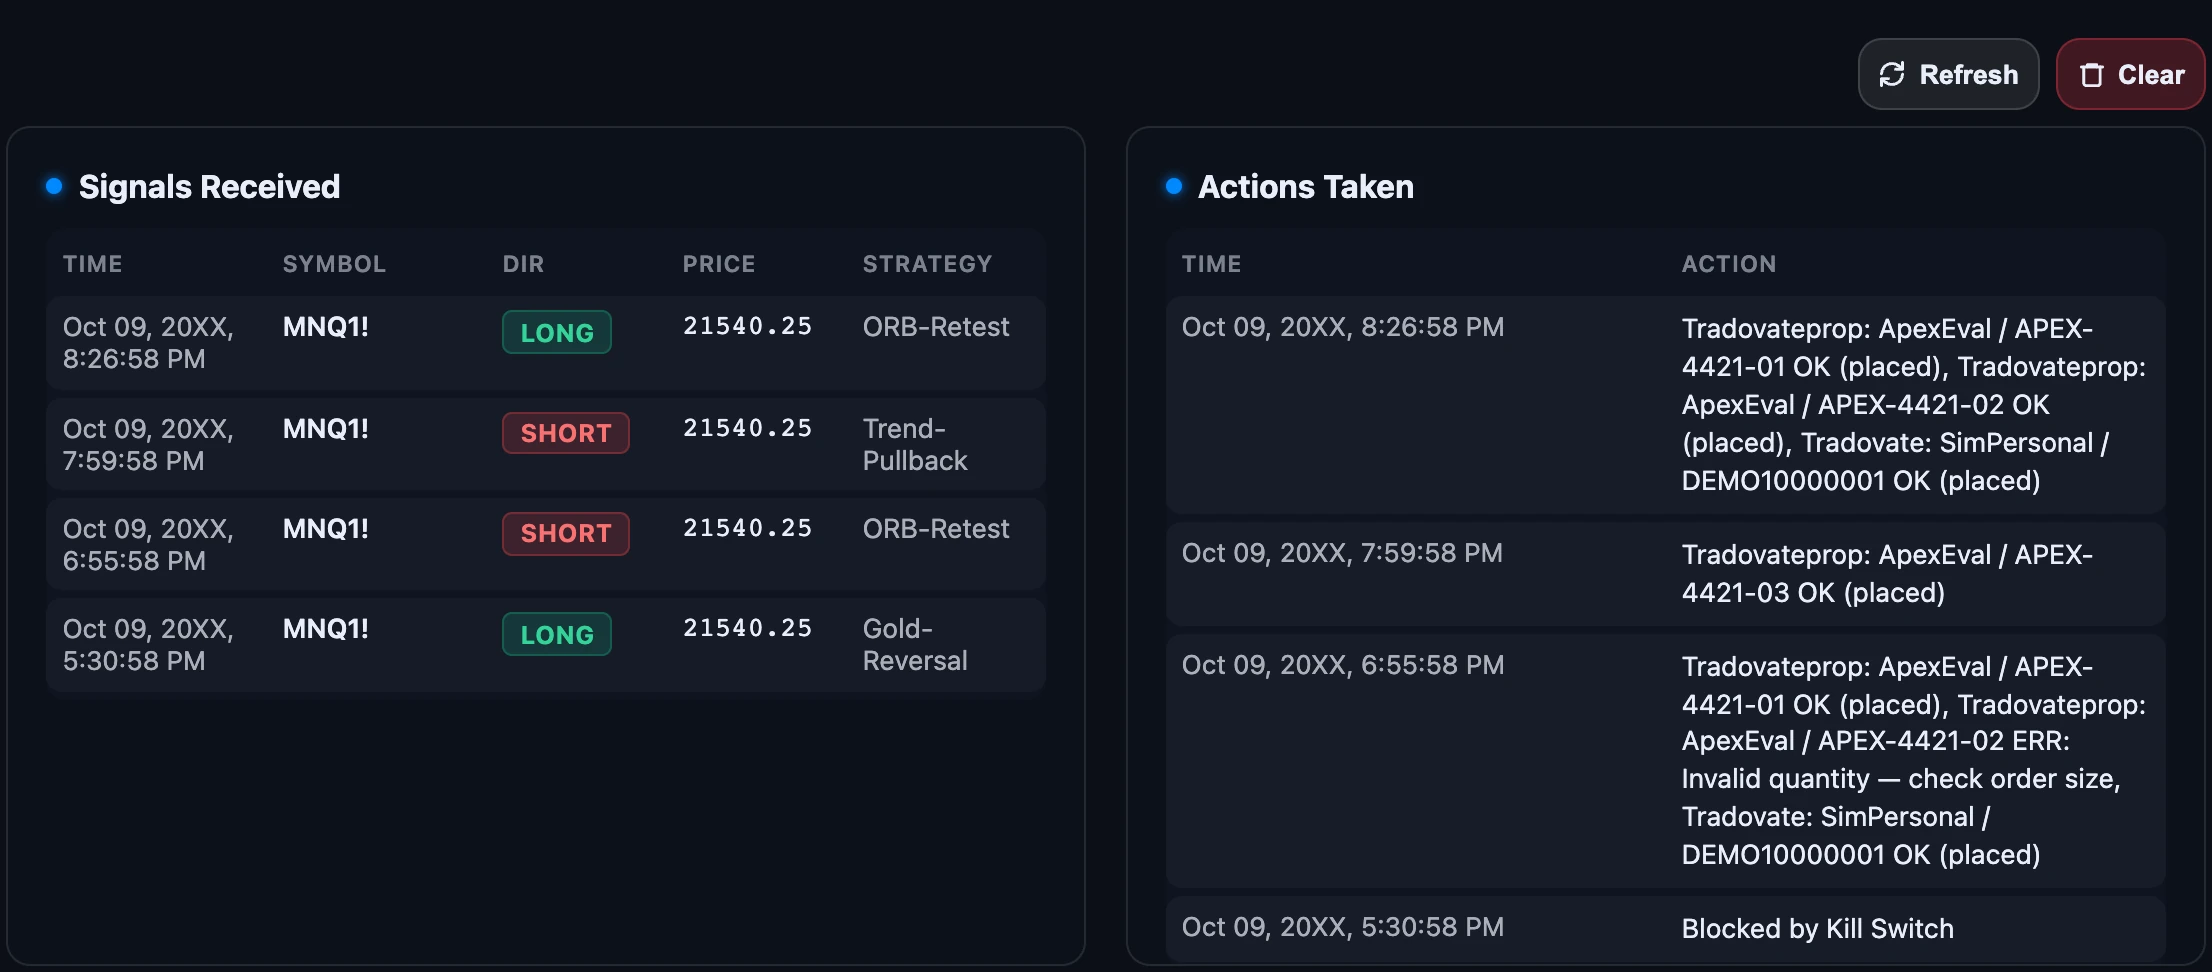
With several accounts ticked you get one line per account in Actions, for example Tradovateprop: ApexEval / APEX-4421-01 OK (placed). A failure on one account never stops the others.
What to check when something feels off
- No signal showed up in the left panel → TradingView never reached us. Check your alert’s Webhook URL field and that the Webhook URL checkbox is on.
- Signal appeared, but no Action on the right → the strategy is DISARMED, or the
"id"in the JSON doesn’t match any Strategy name. - Action says “Blocked by Kill Switch” → the Kill Switch in the action bar is ON. Toggle it off when you’re ready to trade.
- Action shows a broker rejection → hover to see the reason (insufficient margin, contract expired, account disabled, etc.). Fix at Tradovate, then re-fire.
- Action says “REJECTED: Over plan limit” → your setup is over your plan (for example after a downgrade). The red Signals are paused bar lists what to fix: delete extra strategies or untick accounts. Signals resume as soon as you are back under the limit.
- Action says “Strategy is paused: choose the accounts it should trade” → the strategy shows NEEDS ACCOUNTS. Open it, tick the accounts, and save.
- Action says “Account not found or inactive” → press Refresh accounts on the Broker Connection card, then tick the account again.
- Signal Symbol shows the wrong contract → your TradingView chart is on a different contract than your Strategy expects. Adjust one to match the other.
Tab — Account Settings
Subscription, profile, announcements, danger zone.
What lives here
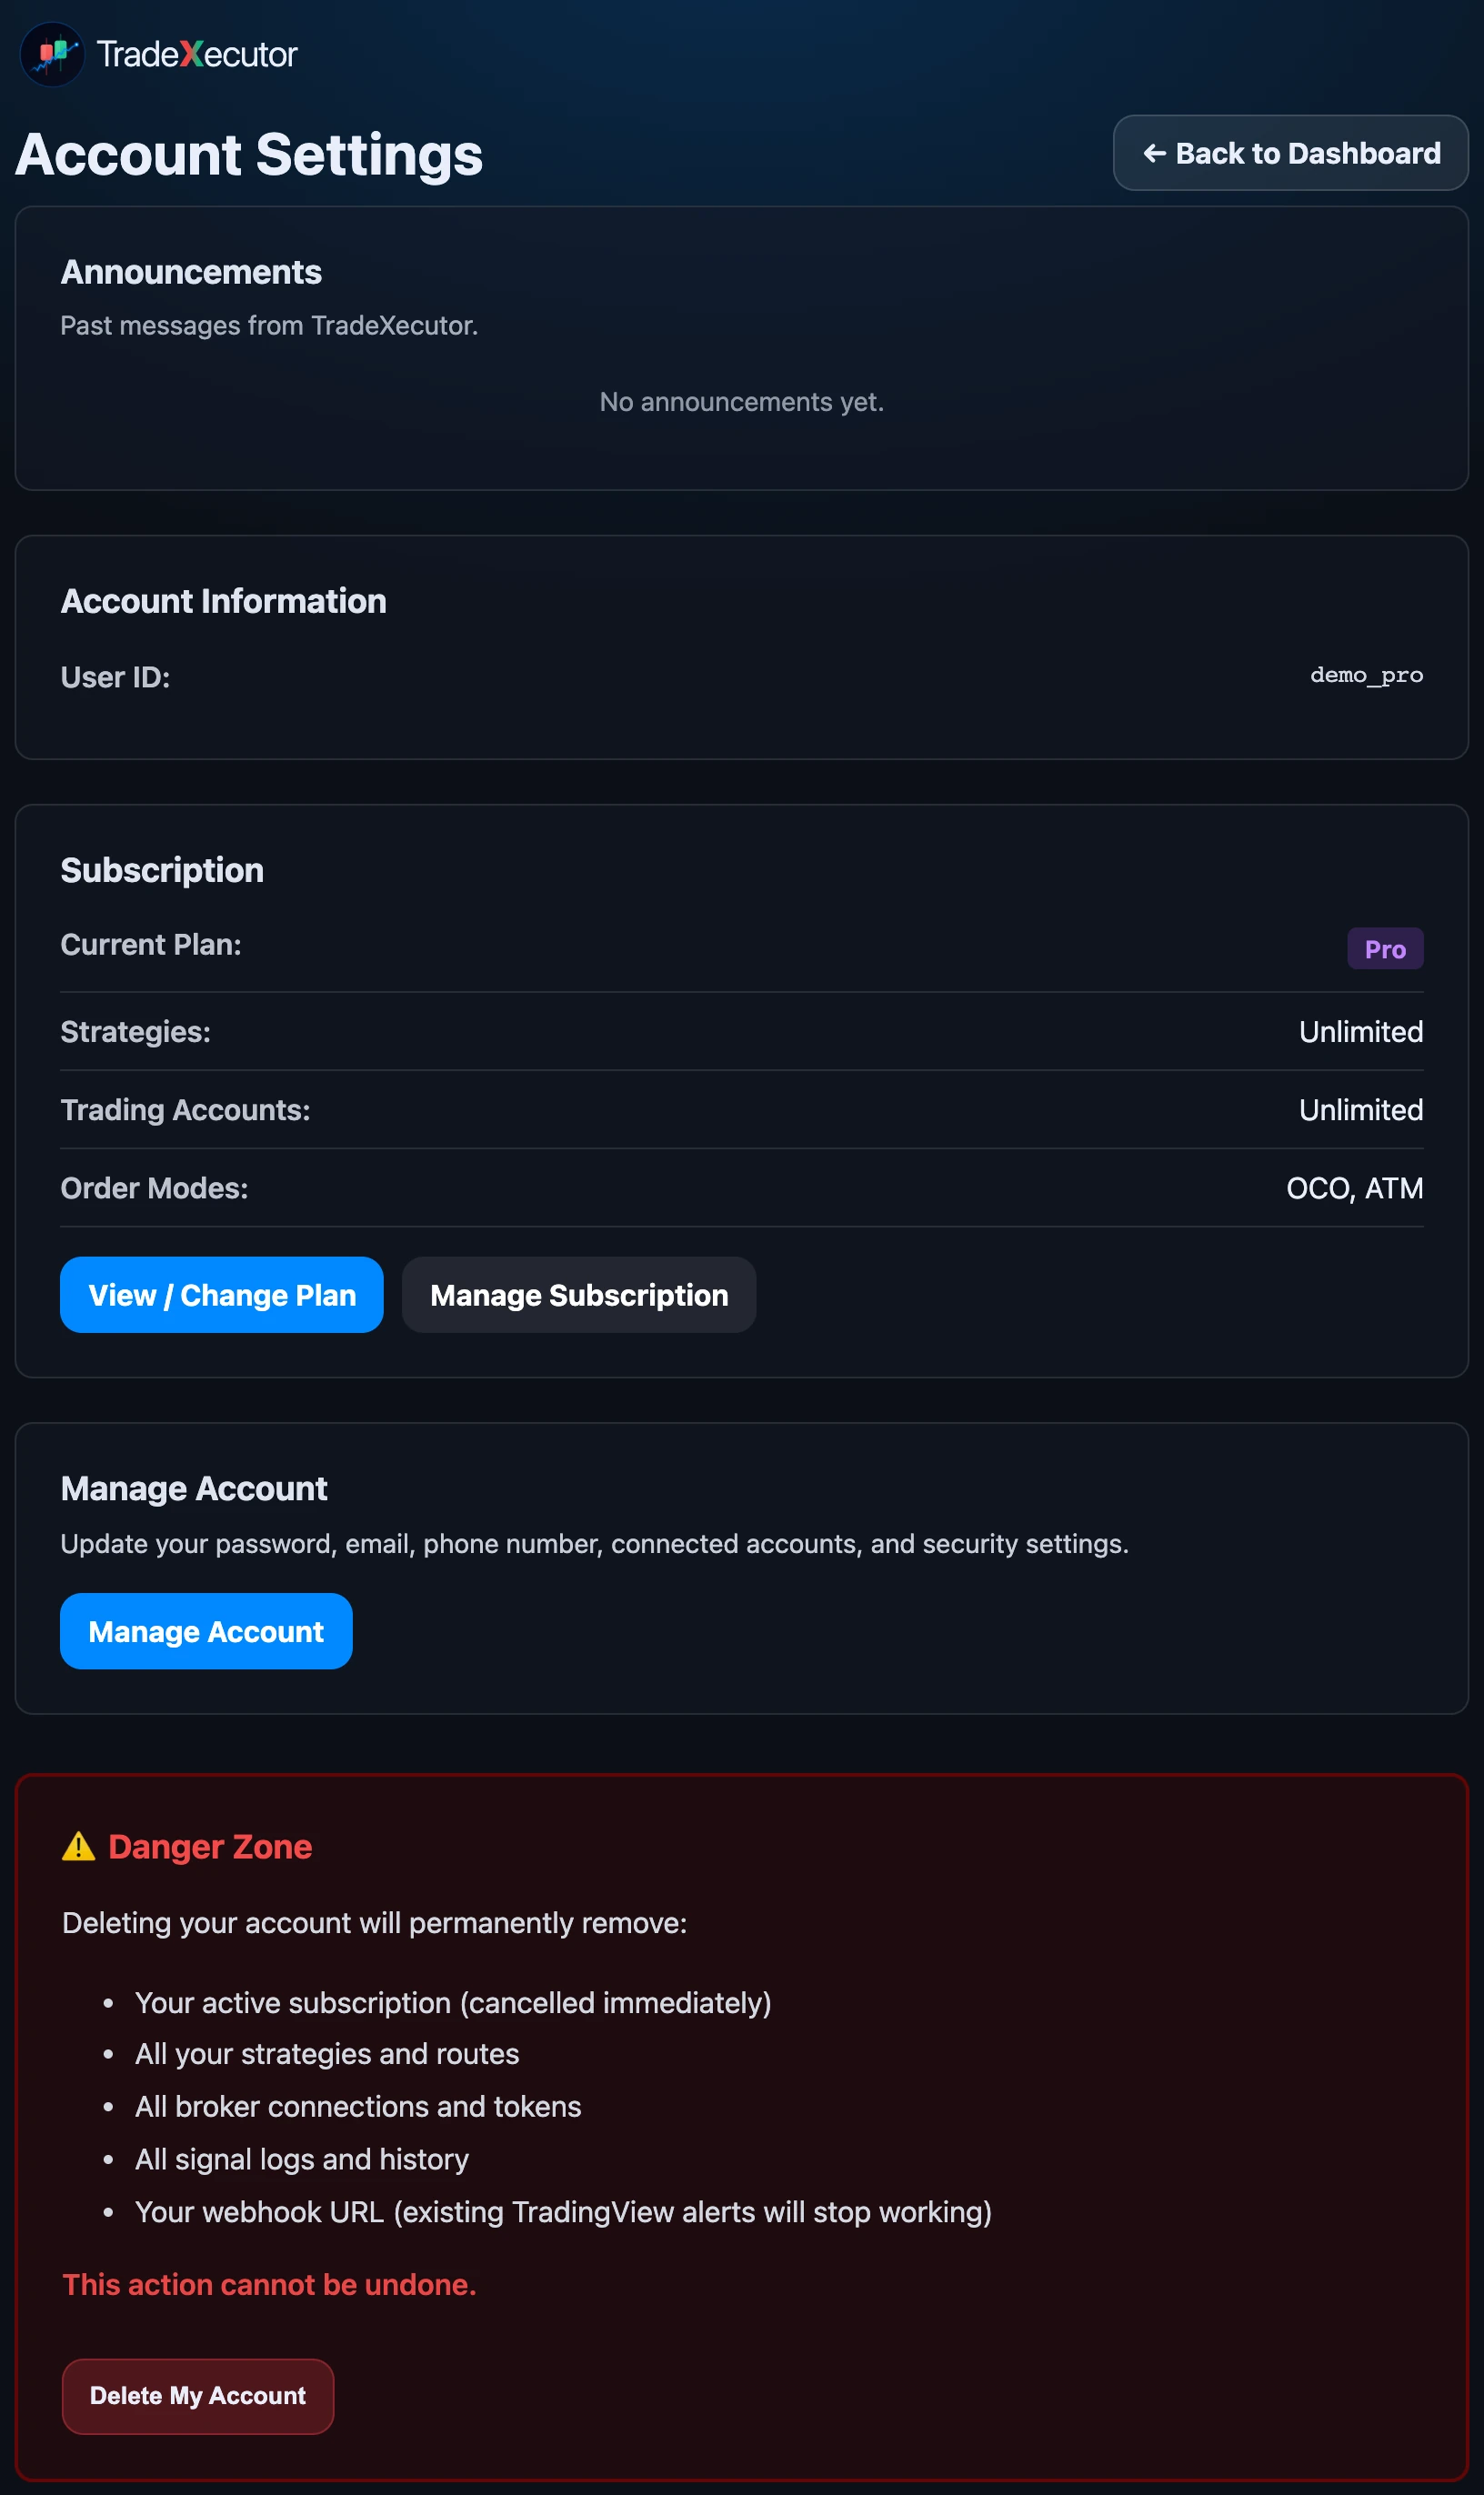
- Subscription — your plan (Basic, Pro, Pro (Invite) or Admin) and its limits, with View / Change Plan to compare and switch plans and Manage Subscription for cards, invoices and cancelling. If you cancel you keep access until the end of your billing period.
- Manage Account — email, password, 2FA (handled by our identity provider).
- Announcements — past messages from the TradeXecutor team.
- Danger Zone — permanently delete your account. Requires typing
DELETEto confirm.
If your plan changes and you are over a limit
- All signals pause and a red banner lists exactly what to fix (too many strategies, too many trading accounts, or an order mode your plan does not include).
- Nothing is changed or re-routed for you: delete the extra strategies or untick accounts, and signals resume.
Putting it together — your first trade
Five minutes, start to finish, on a SIM account.
- 1Open Broker Connection and press + Add Connection. Connect a Tradovate account (your prop firm eval runs in SIM — that’s exactly what we want).
- 2Open Webhook URL and press Copy.
- 3Go to Strategies → Add Strategy. Give it a name you’ll remember (e.g.
ORB). Use Symbol Search to pick your contract. Choose OCO Brackets with a small TP and SL (e.g.20/30ticks). Under Send signals to these accounts, tick your SIM account (Basic allows up to 2 trading accounts in total). Save Strategy. - 4Confirm the strategy row shows ARMED (green, pulsing).
- 5In TradingView, create an alert on your strategy. In Notifications, tick Webhook URL and paste. In Message, paste this, replacing
ORBif you used a different name:{ "id": "ORB", "symbol": "", "direction": "long", "price": "" }
- 6Back on TradeXecutor, press Run Webhook Test in the action bar. A row should appear on the Signals / Actions tab — that confirms wiring before you ever fire a real alert.
- 7Trigger the alert (or wait for it). Watch the top status strip — Last Signal then Last Action update — and confirm the order appears in Tradovate.
That’s the whole system.
Six tabs, one Kill Switch, one webhook URL, one JSON message. Video walkthroughs of each section are on the way — we’ll drop them into this page as they’re recorded.
Back to top